Spot Dog Toy Guide: Top Choices for Playtime Fun
Okay, here’s my attempt at a blog post based on the title "spot dog toy," channeling that seasoned-blogger vibe.
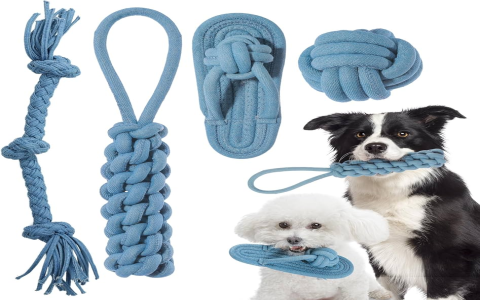
Alright folks, gather 'round! Today, I'm gonna walk you through my latest DIY adventure: making a super fun, durable dog toy. We're talking about a "spot dog toy" – think colorful, engaging, and tough enough to withstand my furry friend's relentless chewing.
The Idea: So, my buddy, Max (he's a golden retriever with the energy of a small nuclear reactor), was demolishing toys faster than I could buy them. Seriously, those store-bought plushies lasted about, oh, five minutes? I was throwing money away! That's when I decided, "Enough is enough! I'm making my own." I wanted something with visual appeal (the spots!), something that would keep him entertained, and most importantly, something that wouldn't end up in a million pieces all over my living room.
Getting Started: First, I raided my fabric stash. You know, that pile of scraps you've been meaning to use for, like, ever? I found some heavy-duty canvas in beige (the base), and then a bunch of colorful felt scraps – red, blue, green, yellow – for the spots. The brighter, the better, right?
- The Pattern: I didn't go crazy with a complicated pattern. I just drew a simple bone shape on some cardboard – about 12 inches long and 6 inches wide at the widest point. Folded the canvas in half, traced the bone, and cut out two identical pieces.
- Spot Time: Next came the fun part: the spots! I grabbed a bunch of different-sized circular objects (jar lids, bottle caps, you name it) and traced circles onto the felt. Cut out a whole pile of these felt circles. The more the merrier!
- Pinning and Sewing: I arranged the felt spots randomly on one of the canvas bone pieces. Pinned them down like crazy – seriously, don't skimp on the pins! Then, using a simple straight stitch on my trusty sewing machine, I sewed each spot onto the canvas. This took a while, but hey, I was catching up on my favorite podcast, so it wasn't all bad.
Putting it Together: With all the spots securely attached, it was time to assemble the toy. I placed the two canvas bone pieces right sides together, pinned around the edges (leaving a few inches open for stuffing), and sewed all the way around using a strong stitch. I reinforced the corners because I knew Max would be going to town on those.
Stuffing and Finishing: I turned the bone right side out (this is where a chopstick or something similar comes in handy for pushing out the corners), and then the real fun began: stuffing! I used a combination of old t-shirt scraps and some poly-fil I had lying around. I stuffed it nice and firm – you don't want a floppy bone! Once it was stuffed to my liking, I carefully hand-stitched the opening closed with a hidden stitch. This part is important, gotta make sure it's secure!
The Grand Reveal!
The moment of truth! I presented the finished "spot dog toy" to Max. His eyes lit up! He sniffed it, nudged it, and then...the chewing commenced. And guess what? It held up! The heavy-duty canvas and reinforced stitching did the trick. He's been playing with it for days now, and it's still in one piece. Victory!
Final Thoughts: This DIY project was a total success. Not only did I save some money (compared to buying those flimsy store-bought toys), but I also created something durable and engaging for my furry pal. Plus, it was kinda fun! If you're looking for a project to keep your dog entertained, I highly recommend giving this "spot dog toy" a try. Just remember to use strong materials, reinforce your stitching, and stuff it good! Happy crafting!